
Common superwide format products are banners and posters. In Visual Product Builder, after you click Begin next to a superwide format product in the catalog, you provide the content file for the job and customize the product all in the same window. When you are satisfied with your selections, you add the product to the shopping cart.
Notes:
●
At any time you can save your work by clicking Save
My Job at the top of the page. This allows you to return
to the job later. If you are not registered on the site, you can register
after clicking Save Job (you must
be registered to save jobs and check out).
●
If the product is part of a kit, some
fields will not apply and some information may already be filled in for
you. You will also see a Finish
button instead of Add to Cart.
● The file that you supply can have one page. (If the file has more than one page, only the first page is used for the job; any additional pages are ignored.)
● In order to preview a file, it must be in PDF format. If you supply a file in another format, a sample image is shown instead.
● The content file for a superwide format product is typically very large so a Background Uploader utility is required to upload your file. The system checks whether this utility is installed. If it is not installed, you are asked to install it. (This is a one-time procedure.)
After Background Uploader is installed,
● Click Add Files to supply the content file for the job.
After you add your file, it is listed under Files, and a preview is automatically displayed on the right. If the file is still uploading, a sample image is displayed in its place.
Tip: Your file can be uploaded in the background as you select print options and even as you check out and place your order.
1. In the Job Name field, enter a descriptive name for your customized product so you can identify it easily. (A job is just your customized product. When an order includes several jobs, each is an item in the order.)
2. In the Quantity field, specify the amount you are ordering. The quantity affects the price.
Notes:
●
The options that are available to you depend on the product you selected.
●
Sometimes an option will be unavailable because it is incompatible with
another option you already selected. For example, if you selected canvas
as the substrate, lamination may be unavailable as a selection. Move the
pointer over the ? next to the
unavailable option to see an explanation for its unavailability. You can
then change your selections if necessary.
1. In the left-hand pane, click an option, for example, Media, Hems and Support – Left, or Grommets for Banners.
2. Make further selections as necessary. For example, after clicking Media you must select a substrate. In addition, note the following about Hems and Support and Grommets for Banners:
Hems and supports can be added on the left, right, top, or bottom sides. After you select the side you want (for example, Hems and Support – Right); you select a support (for example, Nylon Rope); and then select the type of hem you want (for example, Welded Hem). The available selections depend on the product you are ordering.
The preview will not show the hems and support, but the graphic to the left of the Hems and Support option identifies your choice. In addition, you can click Review My Job for a summary of what the job includes.
Depending on the product, a variety of grommets may be available, and you may be able to indicate how many grommets you want to use per side or space the grommets at specific intervals.
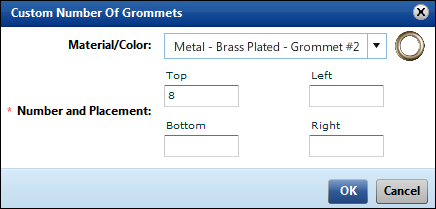
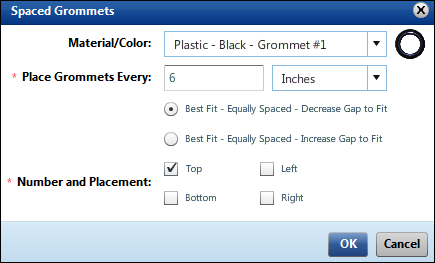
After you select Grommets for Banners, you may have a choice of Custom Number of Grommets or Spaced Grommets.
For Custom Number of Grommets, you select the type of grommet you want and then enter the number of grommets you want on a particular side.
For Spaced Grommets, you select the type of grommet you want; specify the spacing you want (for example, every 6 inches); select the best fit when the spacing does not work exactly; and select the sides where you want the grommets placed.
As with hems and supports, the preview will not show the grommets, but the graphic to the left of the Grommets for Banners option identifies your choice. In addition, you can click Review My Job for a summary of what the job includes.
3. If you have the option of providing non-content files, such as instructions, click Non-Content Files and then browse to the file you want to provide.
● Click  to open a zoom pane so you can zoom in or out by moving a slider.
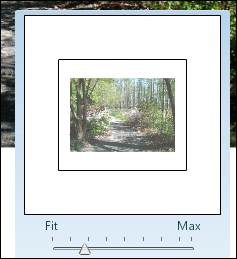
To restore the preview to its default size,
click  .
.
● Make the preview area wider or narrower by
dragging between the left-hand pane and the preview area. To restore the
pane and preview area to their original size, click  on the right side of the pane.
● Drag the image of the product to move it around the preview area.
1. To see more pricing details, move the pointer over the Unit Price/Total Price area in the bottom left corner.
2. To see a summary of the job, click Review My Job at the top of the window. The Job Summary window opens and lists information about the job, for example, file name, quantity, and selected print and finishing options.
1. When you are satisfied with your selections, click Add to Cart.
Note: If the product is part of a kit, a Finish button is displayed instead of Add to Cart. Click Finish to continue with the process of ordering the kit.
2. If prompted, check the preview and the options you selected for accuracy.
3. Proceed with the checkout process when you are ready.