
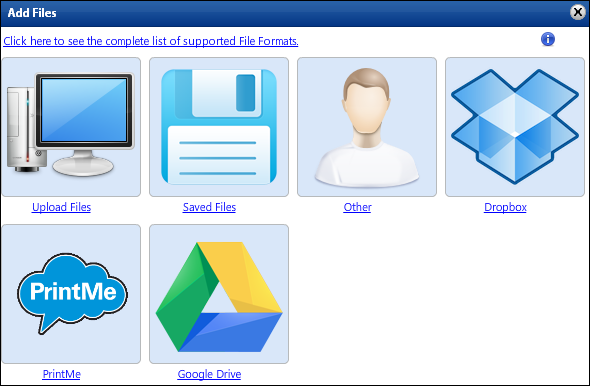
In Visual Product Builder, an Add Files link is displayed when the product you selected requires you to provide the content you want printed, for example, the content for a copy job, flyer, or brochure.
Supply your content in any of these ways (depending how the site is configured):
● Upload files from your computer.
● Download files from the cloud, for example, from Google Drive, Dropbox, or EFI PrintMe.
● Indicate that you are providing the material some other way (for example, CD/DVD or hard copy).
Notes:
●
You can always upload or
download files while customizing
a product as described below. You can also upload
files whenever it is convenient and save them on the site. These saved
files are then available as selections while you are customizing a product.
In addition, you can use
PrintMessenger to send high-quality PDFs directly from an application
on your computer to the site.
●
For a superwide format product, only one file is allowed. It must include
only one page (additional pages are ignored). Follow the instructions
below but ignore the references to multiple
files.
1. Click Add Files.
Tip:
If you upload a file and then want to add another file, click![]() to the right of Files (the Add Files link is not displayed
after you upload the first file for the job).
to the right of Files (the Add Files link is not displayed
after you upload the first file for the job).
![]()
2. Click Upload Files.
3. Do the following:
a. Find the file you want to upload and click Open.
b. Files that you upload may automatically be converted to PDF format, but if the Convert to PDF check box is displayed, leave it selected to convert the file (unless you need to keep the file in its original format).
Tip: Most print shops prefer to receive PDFs since they preserve your layout, number of pages, and so on. When opened on another computer, a PDF will look the same as on your computer, while files in their original formats may not look the same.
c. If you expect to use this file again in the future, select the Save File for Later Re-Use check box.
4. To upload more files (up to 15 at the same time), click Add More Files and repeat step 3. (Multiple PDFs are combined into one file.)
Tip: A job can have an unlimited number of files. If you need to add more than 15 (the limit you can upload at the same time), repeat this procedure.
5. Click Upload.
Notes:
●
If a pre-flight error is detected (for example, a type face is not embedded),
an error message is temporarily displayed. For details, click  next to the file name and
select View Preflight
Report. You can then print the report, or accept or remove the
content file.
next to the file name and
select View Preflight
Report. You can then print the report, or accept or remove the
content file.
●
If the system detects missing fonts, a dialog box opens and gives you
the option of substituting fonts or canceling the upload.
●
If an error occurs during the conversion to PDF, delete the file (by clicking
next to the file name and selecting Remove
file) and upload the file without trying to convert it. The preview
will then consist of a sample page with the page number centered on the
page.
6. After the upload is complete, click Done. The files you uploaded are now listed under Files and displayed (as one continuous file) in the preview pane.
7. If you uploaded more than one file, the files
are combined into one file in the order they are listed. This is also
the order in which they will be printed. To change the order of the files,
click next to a file and select Move
file up in print order or Move
file down in print order.
Tip: If you have added many files, you can expand the Files pane by dragging between the Files pane and the Job Name pane.
If a service that you use for cloud storage is listed in the Add Files window, you can download content files from the cloud when ordering a product that requires you to supply content.
Before you can download files from the cloud:
● For Google Drive, you need a Google account, and your files must already be uploaded to Google Drive.
● For Dropbox, you need an account and your files must already be uploaded.
● For PrintMe, no account is necessary, but your file must already be uploaded to PrintMe, and you should have a document ID for the uploaded file.
Depending how the site is configured, you may have the choice of Google Drive, Dropbox, or PrintMe.
To download a file from Google Drive
1. Click
Add Files. (If this link is not
displayed, click ![]() to the right
of Files.) The Add Files window
opens.
to the right
of Files.) The Add Files window
opens.
2. Click Google Drive. (If Google Drive is not displayed in the Add Files window, you cannot download files from Google Drive.)
3. Enter the user name and password for your Google account. (If you are already logged into your Google account, you will not be asked for your user name and password.)
4. If asked about allowing access to the service, click Grant Access and click Yes in any other windows that open.
5. Add the file from Google Drive:
a. Find the content file(s) you want to use and select their check boxes.
b. If the # Pages column is displayed, enter the page count for the file.
c. If a file is not in PDF format, but the Convert files to PDF check box is available, select this check box to convert the file to PDF.
d. If you expect to use this file again in the future, select the Save file for later re-use check box. (The file is saved in your library of files.)
e. Click Add Files.
Note: When you download files that you created in Google Docs (for example, Docs or Sheets), Google automatically converts them to PDF format. On Google Drive, however, those files remain in their original format. When you download files that were created with another application, for example, Microsoft Word files, you can choose whether to convert them to PDF (step 5c above). PDF format is recommended.
6. Once the files are downloaded, click Done. The files you downloaded are now listed under Files and displayed (as one continuous file) in the preview pane.
7. If you downloaded more than one file, the
files are combined into one file in the order they are listed. This is
also the order in which they will be printed. To change the order of the
files, click next to a file and select Move
file up in print order or Move
file down in print order.
To download a file from Dropbox
1. Click
Add Files. (If this link
is not displayed, click ![]() to the right of Files.)
The Add Files window opens.
to the right of Files.)
The Add Files window opens.
2. Click Dropbox. (If Dropbox is not displayed in the Add Files window, you cannot download files from Dropbox.)
3. Enter the user name and password for your Dropbox account.
4. If asked about allowing access to the service, click Allow.
5. Add the file from Dropbox:
a. Find the content file(s) you want to use and select their check boxes.
b. If the # Pages column is displayed, enter the page count for the file.
c. If a file is not in PDF format, but the Convert files to PDF check box is available, select this check box to convert the file to PDF.
d. If you expect to use this file again in the future, select the Save file for later re-use check box. (The file is saved in your library of files.)
e. Click Add Files.
6. Once the files are downloaded, click Done. The files you downloaded are now listed under Files and displayed (as one continuous file) in the preview pane.
7. If you downloaded more than one file, the
files are combined into one file in the order they are listed. This is
also the order in which they will be printed. To change the order of the
files, click next to a file and select Move
file up in print order or Move
file down in print order.
To download a file from PrintMe
To download a file from PrintMe, you must have uploaded the file to PrintMe and received a document ID via e-mail.
1. Click
Add Files. (If this link is not
displayed, click ![]() to the right
of Files.) The Add Files window
opens.
to the right
of Files.) The Add Files window
opens.
2. Click PrintMe. (If PrintMe is not displayed in the Add Files window, you cannot download files from PrintMe.)
3. Enter the document ID you received from PrintMe.
4. Add the file from PrintMe:
a. Find the content file(s) you want to use and select their check boxes.
b. If a file is not in PDF format, but the Convert files to PDF check box is available, select this check box to convert the file to PDF.
c. If you expect to use this file again in the future, select the Save file for later re-use check box. (The file is saved in your library of files.)
d. Click Add Files.
5. Once the files are downloaded, click Done. The files you downloaded are now listed under Files and displayed (as one continuous file) in the preview pane.
6. If you downloaded more than one file, the
files are combined into one file in the order they are listed. This is
also the order in which they will be printed. To change the order of the
files, click next to a file and select Move
file up in print order or Move
file down in print order.
If you have saved files (ones that you previously uploaded/downloaded and saved, or files that you uploaded directly to the site), you can select a saved file for the product you are ordering.
1. Click
Add Files. (If this link is not
displayed, click ![]() to the right
of Files.) The Add Files window
opens.
to the right
of Files.) The Add Files window
opens.
2. Click Saved Files.
3. Under My
Saved Files, select the files you want to use and click ![]() to move the files under Files in My Job.
to move the files under Files in My Job.
Tip: Move the pointer over a file to see some information about the file, for example, its size and creation date. To preview a file, select it and click Preview File.
4. After you select the files you want for the job, click Finish. The files you selected are now listed under Files and displayed (as one continuous file) in the preview pane.
5. If you selected more than one file, the files
are combined into one file in the order they are listed. This is also
the order in which they will be printed. To change the order of the files,
click next to a file and select Move
file up in print order or Move
file down in print order.
If you selected a product that requires you to provide content files, but you do not have the information in digital format (for example, you have a hard-copy document), or you plan to deliver the files later, you can still go through the process of customizing the product you selected. During this process, you just indicate you are delivering the material another way.
1. Click
Add Files. (If this link is not
displayed, click ![]() to the right
of Files.) The Add Files window
opens.
to the right
of Files.) The Add Files window
opens.
2. Click Other.
3. In the Type field, indicate how you are supplying the material, for example, CD/DVD, Portable Drive, or Hard Copy in Box.
4. Enter a File Name.
5. In the No. of Page(s) field, enter the number of pages you plan to deliver. If you have front and back sides, count two pages per sheet. Superwide-format products can have only one page.
6. Under Delivery instructions for hard copy file, enter any special information about the delivery of the material.
7. Click Finish.